


UnifyMe
Privacy-First Smart Nursery DIY Kit
Privacy-First Smart Nursery DIY Kit
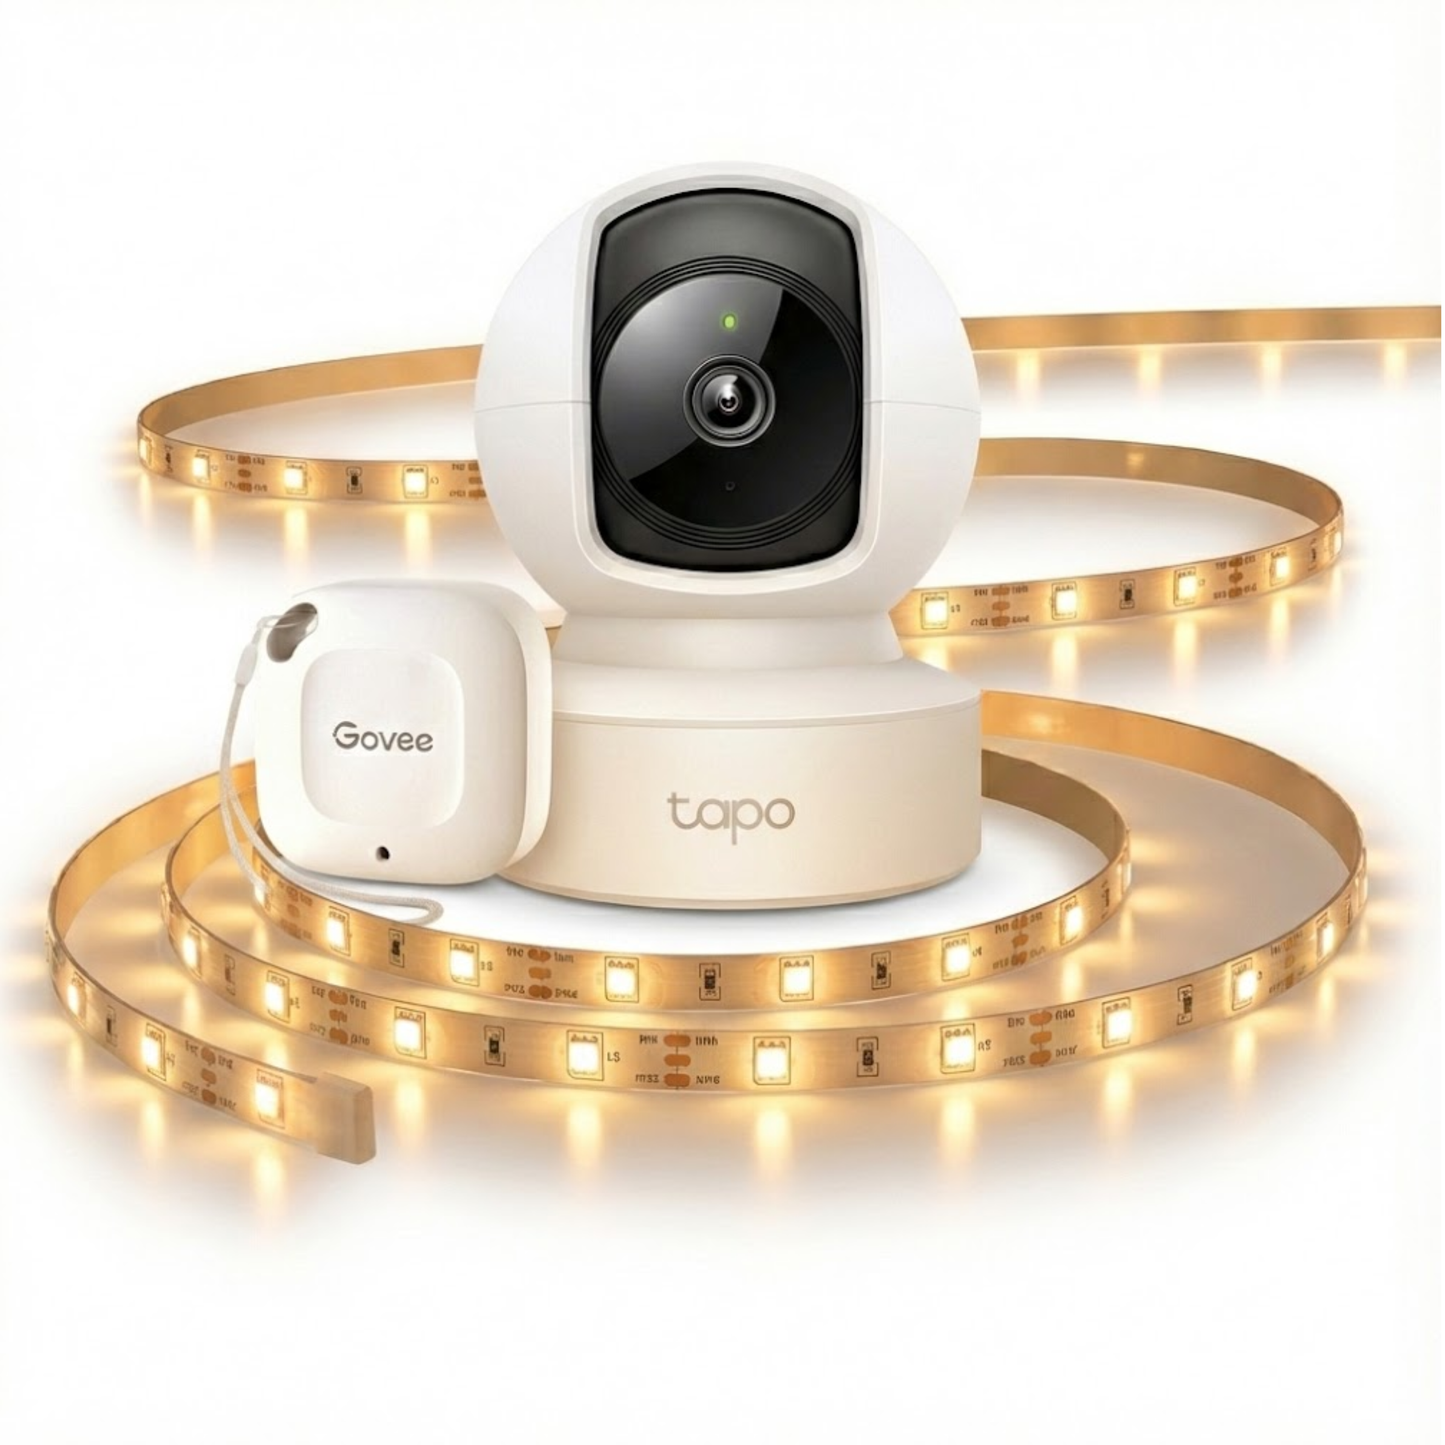
Camera, Smart Lights & Thermometer
What to expect: 60-min DIY set up (EASY)
What to expect: 60-min DIY set up (EASY)
Set up yourself using our step-by-step video guide. No soldering, no wiring — just plug in, connect to Wi-Fi, and follow along. If you've ever set up a streaming stick, you already have the skills.
Physical installation is easy too, with no drilling required!
Our Guarantee
Any issues with the initial setup (excluding physical installation) and we will help! If we can't solve it over email, we will arrange a phone call or video call to troubleshoot with you.
Couldn't load pickup availability
⚠️ Stop Paying Monthly Fees to See Your Own Baby
You shouldn't need a cloud server to check on your sleeping child. You shouldn't pay $10/month for basic features.
And you definitely shouldn't be forced to upload your baby's video to someone else's servers.
Built for parents who care about privacy
This kit gives you everything the expensive brands promise, with zero required subscriptions, local network streaming, privacy control in your hands

Key Features
📹 HD video day or night with optional recording
🚦 Smart lights (dimmable for late night feeds)
🌡️ Temperature and Humidity Tracking (with history)
👕 Sleep Dress Guide (°C) (can be updated to any image or photo)
The Best part? It's designed for real life. Beautiful interface. Works when you're half-asleep. No technical degree required. You'll spend one evening getting it ready, then never think about setup again.
What's Included?
Everything you need to go from unboxing to a working baby monitor dashboard with video, lights, temperature and humidity — in about 60 minutes.
- Home Assistant Green hub & Bluetooth adapter
- Baby room camera, LED light strip & temperature sensor
- 5 video walkthroughs with written step-by-step instructions
- Dashboard wizard — generates your custom monitoring interface from your device names
- Troubleshooting guides for every step + email support if you get stuck
You'll need: A WiFi network, computer for set up and smartphone. That's it.
Optional: BYO micro SD card if you want local video recording.


Your video, your choice
Unlike cloud monitors that force all video through their servers 24/7, this system gives you control:
✅ At home: Video streams locally on your network—nothing uploaded
✅ Local or cloud storage: You decide (BYO local SD card, pay for Tapo Cloud or use live feed only)
✅ Remote access: Optional - Read FAQ for more information

Simple Enough for 3:00AM
One parent might love tinkering with automations. The other just wants to see if the baby's awake. Everyone in your household gets what they need.
The UnifyMe Baby Room Dashboard delivers:
✅ One-tap camera view – Instant local streaming, no cloud delay
✅ Room temperature at a glance – Color-coded comfort zones
✅ Simple controls – Turn on lights, move camera, see temperature history
✅ Clean, modern interface – Works on any phone or tablet
The technical complexity stays hidden. What shows up is a polished app that anyone can use—even when exhausted.

Designed to make your smart home smarter
Imagine this: Control your living room lights, AC, and baby monitor—all in a single dashboard instead of juggling separate apps.
Once you have a Home Assistant device, this becomes reality. This kit teaches you the basics with a real-world use case that actually matters.
Why Tech-Savvy Parents Are Avoiding Cloud Baby Monitors
Other Baby Monitors:
The Hidden Costs
- $600+ over 3 years (device + ongoing subscriptions)
- Renting features you already paid for (subscription)
- Your baby's video stored on their servers
- Dealing with lag and delays
- Locked into their ecosystem
Our Kit: Own It Forever
- $269 or $469 one-time cost
- Everything runs on your network, complete privacy if desired
- Instant streaming, no lag
- No monthly bills. Ever.
- Integrates with your existing smart home
Comparing Our Kit to Others in the Market
| Other Cloud Monitors | Our Kit | |
|---|---|---|
| Monthly Fees | $6.50+/month (often required) | $0 required (see FAQ for more details) |
| 3-Year Cost | $600+ (device + ongoing subscriptions) | $469 (hub included) or $269 (base kit without hub) one-time |
| Video Upload | Continuous (forced) | Your choice (can be local-only) |
| Cloud Storage | Required, on their servers | Optional, your own local storage or cloud |
| Local Streaming | ❌ Must go through cloud | ✅ Direct on your network |
| Remote Access | One way only (their cloud) | Multiple options (your choice) |
| Ecosystem Lock-in | ❌ Locked into one brand's ecosystem | ✅ Compatible with many home automation brands. Reuse hardware as kids grow |
| Setup Time | 15 min | 60 min |

Automation You Can Build Yourself
This kit gives you the foundation to create smart nursery behaviours using Home Assistant's visual automation builder. Here are just a few examples of what you could build
And because you will be using Home Assistant, you can integrate with Philips Hue, smart locks, white noise machines— anything smart that you already own. The possibilities are endless.
You will spend one evening setting this up, and end up with a system that grows with your family.

Privacy-First Smart Nursery DIY Kit
Frequently asked questions
-
If you don't already have a Home Assistant device at home, choose our Complete Kit which includes a Home Assistant Green and Bluetooth dongle.
If you already run Home Assistant at home, you can choose our Base Kit - however you need to ensure your device has bluetooth.For the techies and tinkerers out there: If you have an old computer, you may be able to turn it into a Home Assistant Device and purchase the cheaper base kit! This can be a fun little project if you have the time. Check out youtube videos on how to do this or follow this guide
-
If you can follow IKEA instructions, you can build this. Our guide includes both video tutorials and written instructions with screenshots, assuming zero smart home experience. Average setup: 60 minutes.
We want you to succeed! And we are here to help! We believe our instructions are super easy to follow, but we understand that sometimes things go wrong.
If you get stuck, send us an email with your full name, order ID (found in your digital receipt) and exactly where you are stuck, and we will respond within 24-48 hours. If the issue can't be solved over email, we will set up a video call with you. -
Yes, but this needs to be set up through the Tapo App.
Here is a more detailed explanation on how it works:
The Tapo camera has built-in cry detection using on-device AI (no video is uploaded for analysis). This is turned off by default and must be enabled.
Once enabled, notifications are delivered to your phone through TP-Link's cloud via the Tapo app, so you'll need an internet connection to receive cry alerts on your phone.
As mentioned earlier, no video is uploaded to Tapo's cloud for analysis if this feature is enabled - so your footage is safe. This is why we have selected this camera. -
When you're at home:
Video streams directly from the camera to your Home Assistant dashboard on your local network. Your video is not stored on a cloud unless you have manually opted in for Tapo Cloud.
When you're away from home (optional):
You choose how to access remotely based on your privacy comfort level and your technical level.
I've listed 3 options that are super easy for anyone to set up. Option 1 will work after you have completed our setup guide.- Tapo App for video and lights (Free, no extra set up required) – Video routes through TP-Link's cloud relay. Easy to set up, but video passes through their infrastructure. If you don't want video to route through TP-Link's cloud relay, then don't use the TP-Link app to view your camera when you're away from home. That being said, TP-Link state that unless you have signed up for cloud storage, none of your video is persisted in their storage. This is why we have chosen this camera.
- TailScale VPN (Free, some setup required) - This is not covered in our DIY guide, but from our experience, is very easy to set up. This is a super cool and secure set up where you will be able to access your dashboard away from home, bypassing TP-Link's cloud relays all together.
- Home Assistant Cloud/Nabu Casa (~$8.50 AUD/month, one-click set up) – End-to-end encrypted connection to your Home Assistant. Routes through Nabu Casa's servers but with strong encryption. Simple setup and also bypasses TP-Link's cloud relay.
The key difference between our solution and other cloud monitors:
CuboAi/Owlet upload video to the cloud whether you are home or away — you have no choice. With our solution however, local viewing never involves the cloud, and you control if/how remote access works. -
For in-home viewing: Yes. Video streams locally on your network. If your internet drops, you still have live video, temperature monitoring, and all automations.
For remote viewing: No, you'll need internet. For more info, refer to the previous question.
-
You choose:
- SD card in the camera (local storage, no cloud)
- Don't record at all (live view only)
Unlike cloud monitors, there's no required cloud storage subscription. You own the footage and control where it lives.
Note: If you want to record locally, you will need to BYO micro SD card. This will all be managed through the Tapo App.
Tapo's officially documentation state that if using a SD card, video data is not stored in the cloud. This is why we picked this camera for this kit.
Fun Fact: Using the Tapo app, there is a paid option for cloud storage and you may even be elegible for a free trial. -
We want you to succeed! And we are here to help! We believe our instructions are super easy to follow, but we understand that sometimes things go wrong.
Send us an email with your full name, order ID (found in your digital receipt) and exactly where you are stuck, and we will respond within 24-48 hours. If the issue can't be solved over email, we will set up a video call with you.
If we determine that there is no issue with the kit, but its not working due to another factor (for example range of your wifi) we will do our best to educate you so you can figure out a path forward.
Lastly it's worth mentioning that in addition to our support, there are 1M+ member Home Assistant community forums on facebook and reddit. -
Absolutely. And if you are smart with your camera selection, there will be no new subscriptions. No new apps.
-
The short answer is: No, you don't need to know how to code. This kit takes away all of that complexity for you.
Here's a longer answer for the tinkerers, and anyone who wants to add other smart home devices to their Home Assistant.
For dashboards: Home Assistant has a visual dashboard builder that is easy to learn. I highly encourage you to create a blank dashboard and experiment. If the dashboard doesn't work, then you can just delete it and start again, without risk of breaking anything! That's the best way to learn 🙂
For automations: Home Assistant has a visual automation builder—you set up "if this, then that" rules with dropdowns and buttons. No coding required.
Coding will help you do some super advanced stuff, but it isn't required for the majority of use cases.